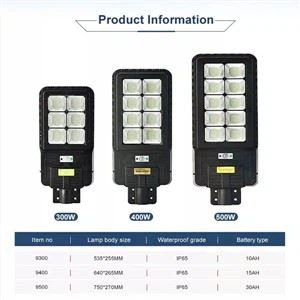
Hey there! As a supplier of LED solar street lamps, I often get asked about the installation process of these nifty lights on poles. It's not as complicated as it might seem, and I'm here to walk you through it step by step.
Step 1: Preparation
Before you start the actual installation, you need to do some prep work. First off, pick the right location for your LED solar street lamp. You want a spot that gets plenty of sunlight throughout the day, as this is crucial for charging the solar panel. Also, make sure the pole is in good condition and can support the weight of the lamp.
Next, gather all the tools you'll need. This usually includes a drill, screws, a ladder (if the pole is tall), and a wrench. It's a good idea to have everything laid out in one place so you don't have to go searching for tools in the middle of the installation.
Step 2: Mounting the Pole
If you're starting from scratch and need to install a new pole, here's what you do. Dig a hole that's deep and wide enough to support the pole. The depth will depend on the height of the pole, but a general rule of thumb is to make the hole about one-third of the pole's height.
Once the hole is ready, place the pole in it and make sure it's perfectly vertical. You can use a level to check this. Then, fill the hole with concrete and let it dry. This might take a few days, so be patient. The concrete will provide a solid foundation for the pole and ensure it stays upright.
Step 3: Installing the Solar Panel
Now, it's time to install the solar panel. Most LED solar street lamps come with an adjustable solar panel, which is great because you can angle it to get the most sunlight. You'll usually find mounting brackets on the pole or on the lamp itself.
Use the drill and screws to attach the solar panel to the mounting brackets. Make sure it's securely fastened so it doesn't come loose in strong winds or bad weather. Angle the panel towards the south (if you're in the northern hemisphere) or north (if you're in the southern hemisphere) to maximize sunlight exposure.
Step 4: Connecting the Battery
The battery is an important part of the LED solar street lamp system. It stores the energy collected by the solar panel during the day so the lamp can shine at night. Most lamps come with a pre - installed battery, but you might need to connect it properly.
Locate the battery compartment on the lamp. It's usually well - protected to prevent damage from the elements. Connect the wires from the solar panel to the battery according to the manufacturer's instructions. Make sure the connections are tight and secure to avoid any power loss.
Step 5: Attaching the LED Lamp
This is the fun part – attaching the LED lamp to the pole. There are usually mounting points on the pole that are designed to fit the lamp. Line up the lamp with the mounting points and use the provided screws or bolts to secure it in place.
Check that the lamp is level and straight. You don't want it tilting to one side. Once it's securely attached, double - check all the connections to make sure everything is working properly.
Step 6: Testing the Lamp
After you've completed all the installation steps, it's time to test the lamp. Wait until nightfall or cover the solar panel with a cloth to simulate night conditions. The lamp should automatically turn on. If it doesn't, check all the connections again to make sure they're secure and that the battery is charged.
If you run into any issues, refer to the user manual that came with the lamp. It usually has troubleshooting tips that can help you figure out what's wrong.
Different Types of LED Solar Street Lamps
We offer a variety of LED solar street lamps to suit different needs. For example, our 40W Adjustable Angle Solar Integrated Street Lights are great for smaller areas or residential streets. They're easy to install and the adjustable angle feature allows you to optimize sunlight collection.
If you need a more powerful option for larger areas, like parking lots or industrial sites, our 90 Watts Solar Street Lights are a great choice. They provide bright, energy - efficient lighting and can cover a wide area.


For a more flexible installation, we also have Solar Energy Split Street Lamp. This type allows you to separate the solar panel, battery, and lamp, which can be useful in some situations where you need to place the components in different locations.
Why Choose Our LED Solar Street Lamps
Our LED solar street lamps are not only easy to install but also offer many benefits. They're energy - efficient, which means you'll save on electricity bills in the long run. They're also environmentally friendly, as they use solar power instead of traditional electricity sources.
We use high - quality materials in our lamps, so you can expect them to last for a long time. And if you ever have any questions or need support, our customer service team is always here to help.
Contact Us for Purchasing
If you're interested in purchasing our LED solar street lamps, we'd love to hear from you. Whether you're a contractor working on a large - scale project or a homeowner looking to light up your driveway, we have the right solution for you. Just reach out to us, and we can discuss your specific needs and provide you with a quote.
References
- General knowledge about solar street lamp installation from years of experience in the industry.
- Manufacturer's manuals of our LED solar street lamps.